React Native .. Android Studio (part2)
In this story we will test our application on Android Device. For the IOS is more easier to manage a react native application and execute it using Expo (check part 1).
So here we need to install Android Studio on the Laptop, make the configuration bellow:
1- Set up Android SDK
you can open the window from : file -> settings ->Appearance & Behavior ->System Settings -> Android SDK
Or just click this button at the top-right for Android Studio :


For SDK Platforms as we can see i use Android 11.0 and Android 7.0 because i want to make an emulator with old version and one with new version of Android because these a difference in the fonctionnalty, you see that when you check “show Package Details” ;)
let see SDK Tools now :

I will mention for you the version that i use in each installed package:
- Android SDK Build-Tools 31 : version 31.0.0, 30.0.0, 28.0.3
- NDK (native development kit that what you will need in react native as a native kit) : version 20.0.5594570 is required
- Android SDK Command-line Tools : 2.0
- Check mark in Android Emulator and Android SDK Platform-Tools
Finally, SDK Update Sites :

2- Create your virtual Devices
Open the Android Virtual Device Manager from this icon at the top-right of Android studio

- Click in “ + Create Virtual Device…”

- Choose the device that you want to test your application with then next :

- Choose one of the Systems that you download it earlier then next :

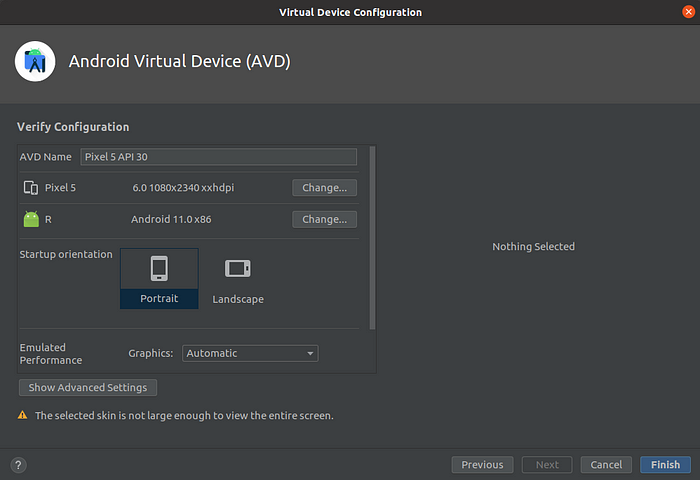
- Verify Configuration and we finish :
3- Run your device :
In the AVD Manager again you can run your device with the play button or choose “cold boot now” :

And here we are !! we have our small phone running in our laptop .. yeeeey :D
